
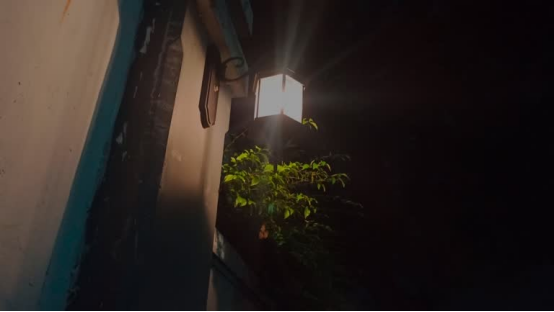
A dim outdoor wall light is more than an annoyance; it’s a safety and convenience issue. Struggling to find your keys at the front door, navigating a dark patio, or feeling uneasy on a poorly lit walkway are common problems with a simple solution. Often, the issue isn’t the outdoor wall light itself, but how it’s configured and used. This guide will diagnose the real causes of poor brightness and provide a clear, actionable plan—using a versatile dual-head sconce as our example—to transform your exterior lighting from feeble to brilliant.
Discover how the right approach can make your nights feel as clear as day. For a fixture designed with brightness in mind, explore this high-output dual-head outdoor wall light.
Table of Contents
Diagnosis: The 4 Real Reasons Your Outdoor Wall Light is Dim
Before spending money, understand the root cause. Brightness fails due to a combination of equipment, placement, and environment.
- The Wrong Bulb (Most Common Culprit): Using a bulb with low lumens (the measure of light output) or a poor Color Rendering Index (CRI) is the top mistake. A 10W incandescent bulb produces a meager ~80 lumens, while a modern 20W LED can output over 2000 lumens. Wattage measures energy use, not light.
- Poor Placement & Positioning: A light installed too high, too low, or too far from the area you need to illuminate wastes its potential. Obstructions like shrubs, overhangs, or the wall itself can cast shadows and create dark zones.
- Fixture Design Limitations: A dark or textured glass shade, a fixed (non-adjustable) head, or an internal design that traps light can significantly reduce the usable output of even a powerful bulb.
- Environmental Degradation: Outdoor conditions are harsh. Dust, dirt, moisture, and bugs accumulating on the bulb and inside the fixture shade act like a veil, progressively dimming the light over time.
The Brightness Solution: How a Dual-Head Wall Light Maximizes Output
A well-designed fixture provides the foundation for excellent illumination. A dual-head outdoor wall sconce offers specific advantages for overcoming common brightness barriers.
- Dual Light Sources: Two bulbs instantly double the potential lumen output compared to a single-bulb fixture, providing wider and more even coverage.
- Optimized Optics: A clear glass shade (like the one on our example fixture) offers 90-95% light transmission, unlike seeded or frosted glass that can block 40% or more of the light.
- Strategic Design: Adjustable heads allow you to direct light precisely where it’s needed—down a path, across a patio, or onto a doorway. A weatherproof outdoor light with a good IP rating (like IP44) protects the electrical components, ensuring consistent performance through rain and dust.
Real-World Brightness Test: Bulb Comparison
Fixture: Dual-Head Sconce (E12 Sockets) | Mounting Height: 6 ft | Area: 150 sq ft Patio
| Bulb Type | Power | Lumens (per bulb) | Result | Best For |
|---|---|---|---|---|
| Incandescent | 40W | ~360 lm | Dim, yellow light. Illuminates only immediate area (~30 sq ft). | Emergency use only. |
| CFL | 23W | ~1500 lm | Acceptable, even light. Covers most of patio (100 sq ft). | General porch/entry lighting. |
| High-Lumen LED | 20W | ~2200 lm | Bright, clear white light. Fully illuminates entire area (150 sq ft). Details are sharp. | Driveways, large patios, security lighting. |
Key Takeaway: Paired with two 20W high-lumen LEDs, the dual-head exterior wall light can deliver a combined 4400+ lumens, transforming a dark space into a well-lit, usable area at night.
Your 4-Step Action Plan to Maximize Brightness
Step 1: Choose the Right Bulb (This is 80% of the Fix)
- Prioritize Lumens, Not Watts: Look for the lumen rating on the bulb package. For general outdoor area lighting, aim for 1500-2500 lumens per bulb.
- Get the Correct Base & Wattage: Match the bulb base (e.g., E12) to your fixture’s socket and respect the maximum wattage rating.
- Select Optimal Color Temperature: Choose 4000K-5000K (neutral to cool white) for security and clarity. It appears brighter and has better atmospheric penetration than warm white.
- Check the CRI: A Color Rendering Index (CRI) of 80+ means colors look more accurate and true under the light, aiding in identification and detail recognition.
Step 2: Install for Maximum Impact
- Ideal Height: Mount eye-level or slightly higher (5.5 – 6.5 ft). This minimizes glare while allowing light to spread effectively.
- Strategic Placement: For doorways, install on both sides of the door. For paths or patios, position lights to overlap their coverage, eliminating shadows.
- Aim the Light: If your wall mounted outdoor light has adjustable heads, angle them downward (15-30 degrees) to focus light on the ground or activity area, not into the sky or your neighbor’s window.
Step 3: Optimize and Reduce Light Loss
- Keep It Clean: Wipe the glass shade and bulb (when cool) with a damp cloth every 1-2 months. A layer of dust can reduce light output by 20% or more.
- Clear the Stage: Trim back any foliage or remove decor that blocks the light’s path. Ensure the fixture has a clear “line of sight” to the area you want to illuminate.
Step 4: Maintain for Long-Term Performance
- Schedule Bulb Replacement: Even long-life LEDs can gradually lose output. Consider replacing them every 2-3 years to maintain peak brightness.
- Inspect Seals and Wiring: For waterproof outdoor lights, periodically check that gaskets are intact and the electrical box is sealed to prevent moisture-related corrosion or failure.
Brightness by Scene: Tailored Lighting Plans
- Front Entry: Use two high-lumen (2000+ lm) bulbs in dual sconces flanking the door. This provides excellent facial recognition and eliminates dark corners for safety.
- Patio or Deck: Space multiple fixtures around the perimeter. Use slightly lower-lumen bulbs (1500-1800 lm) with a warmer tone (3000K) for ambiance, ensuring even coverage without harsh spots.
- Pathway or Driveway: Install fixtures with downward-facing heads every 8-10 feet. Use high-lumen, neutral-white LEDs to clearly define edges and surface details for safe navigation.
- Garage & Work Areas: Maximize output here. Use the highest-lumen bulbs your fixture allows, focused directly on the work area or driveway for tasks and security.
Conclusion: Light It Right, Enjoy the Night
A dim outdoor wall light doesn’t mean you need a new fixture. By understanding the principles of lumens, placement, and maintenance, you can dramatically improve your exterior lighting. Starting with a capable fixture like a dual-head sconce and pairing it with high-output LED bulbs is the most effective upgrade you can make.
Ready to shed light on your outdoor spaces? See how a dual-head outdoor wall sconce can be the foundation of your brighter, safer home exterior.