
Installing an outdoor wall light can feel intimidating for many homeowners, especially when dealing with fixtures like an aluminum outdoor wall lamp that seem “professional-grade.” However, installation is far simpler than it appears. Whether you choose a wired LED model or a solar-powered light, a DIY beginner can complete the project in 1–2 hours with basic tools, saving $50–$100 in professional installation fees. This guide breaks down installation steps for both wired and solar wall lights, highlights common pitfalls, and explains how to make the process smooth, especially for lightweight, beginner-friendly fixtures (see recommended lamp here).
Table of Contents
Step One: Simple Prerequisites for Beginner Success
DIY beginners only need to meet two basic requirements to install outdoor wall lights safely:
Basic Tools Are Enough
You don’t need professional electrician equipment. Most homes already have what’s needed:
Core tools: Cordless drill with 6–8mm drill bits, screwdrivers (Phillips/Flathead), small level (or smartphone app), tape measure
Auxiliary tools: Pencil for marking, expansion anchors (usually included; 6mm for lightweight aluminum lights), gloves for safety
Even if you don’t own a drill, it can be rented for ~$3/day at hardware stores, keeping costs low.
Wall Compatibility
Most exterior walls—cement, brick, wood, drywall, or tile—work fine:
Cement/Brick: Drill directly; anchors hold firmly
Wood/Drywall: Use wood screws or specialized anchors to avoid cracking
Tile: Drill through tile with a tile bit first, then switch to regular bit for cement layer
Lightweight aluminum wall lights (0.8–1.5 kg) require minimal wall strength, making them suitable for most outdoor surfaces.
Step Two: Installing Wired Wall Lights in 5 Steps
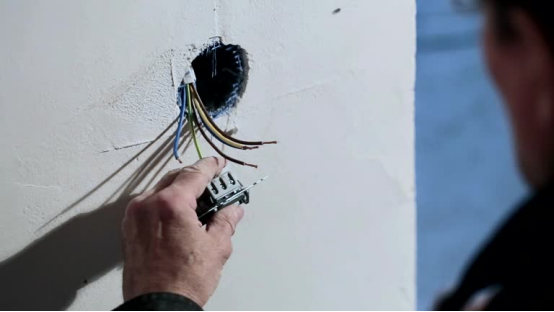
Wired lights require connection to home circuits, so electrical safety is crucial.
Step 1: Position and Mark
Recommended height: 6–7 ft (1.8–2.2 m) for front doors; 5–6 ft for patios or hallways
Use the backplate to mark screw holes (usually 2–3) with a pencil
Align with a level to prevent crooked installation
Step 2: Power Off
Switch off the outdoor circuit breaker
Verify with a non-contact voltage tester that wires are de-energized
Step 3: Drill Holes and Insert Anchors
Use the appropriate drill bit for your wall type
Drill vertically to a depth slightly longer than the anchor length
Insert anchors flush with the wall and secure screws partially for backplate installation
Step 4: Wire Connections
Match wire colors: hot (red/yellow), neutral (blue/black), ground (green/yellow)
Twist connections with wire nuts and optionally wrap with electrical tape
Attach backplate to wall, ensuring it sits flush and stable
Step 5: Attach Fixture and Test
Snap or screw the light body onto the backplate
Restore power and test the light
Apply silicone sealant around backplate edges and wire entries to prevent water ingress
Step Three: Installing Solar Wall Lights in 4 Steps
Solar models eliminate wiring, making installation even easier.
Step 1: Select Location
South-facing, unobstructed for at least 4 hours of direct sunlight daily
Mount height similar to wired lights for optimal coverage
Step 2: Mark and Drill
Align backplate, mark holes, and drill as described above
Insert anchors and partially secure screws
Step 3: Fix Backplate and Attach Light
Snap or screw the light onto the backplate
Turn on the solar panel; some models require 6 hours initial charging
Step 4: Test Functionality
Daylight: light should remain off
Evening: cover solar panel or trigger motion sensor to confirm proper operation
Step Four: Common Beginner Pitfalls
Avoid these frequent mistakes:
Skipping power-off: Risk of electric shock
Drilling at an angle: Leads to crooked installation
Exposed wire connections: Can short-circuit in rain
Blocking sunlight for solar panels: Reduces battery life
Skipping waterproof check: Rain can damage wiring or battery compartment
Step Five: Why Aluminum Outdoor Wall Lights Are Beginner-Friendly
Recommended aluminum wall lights (link) offer several advantages:
Lightweight (1.2 kg): Easy to handle alone
Well-designed backplate: Screw spacing ~3″, thin profile, easy alignment
Snap-on fixture: Eliminates complex screwing, prevents misalignment
Built-in waterproofing: Pre-installed gaskets reduce extra steps
Conclusion
Installing an outdoor wall light is far simpler than many fear. Wired models require proper power-off and color-matched wiring; solar models require sunlight exposure. By preparing basic tools, marking holes carefully, and following step-by-step instructions, beginners can confidently complete installation while saving professional installation costs. The recommended aluminum outdoor wall lamp simplifies the process further, making DIY installation straightforward, safe, and enjoyable.
CTA Examples:
Explore our aluminum outdoor wall lamp designed for quick, beginner-friendly installation.
Find the perfect solar or wired outdoor wall light for your patio or entrance at our detailed fixture shop.